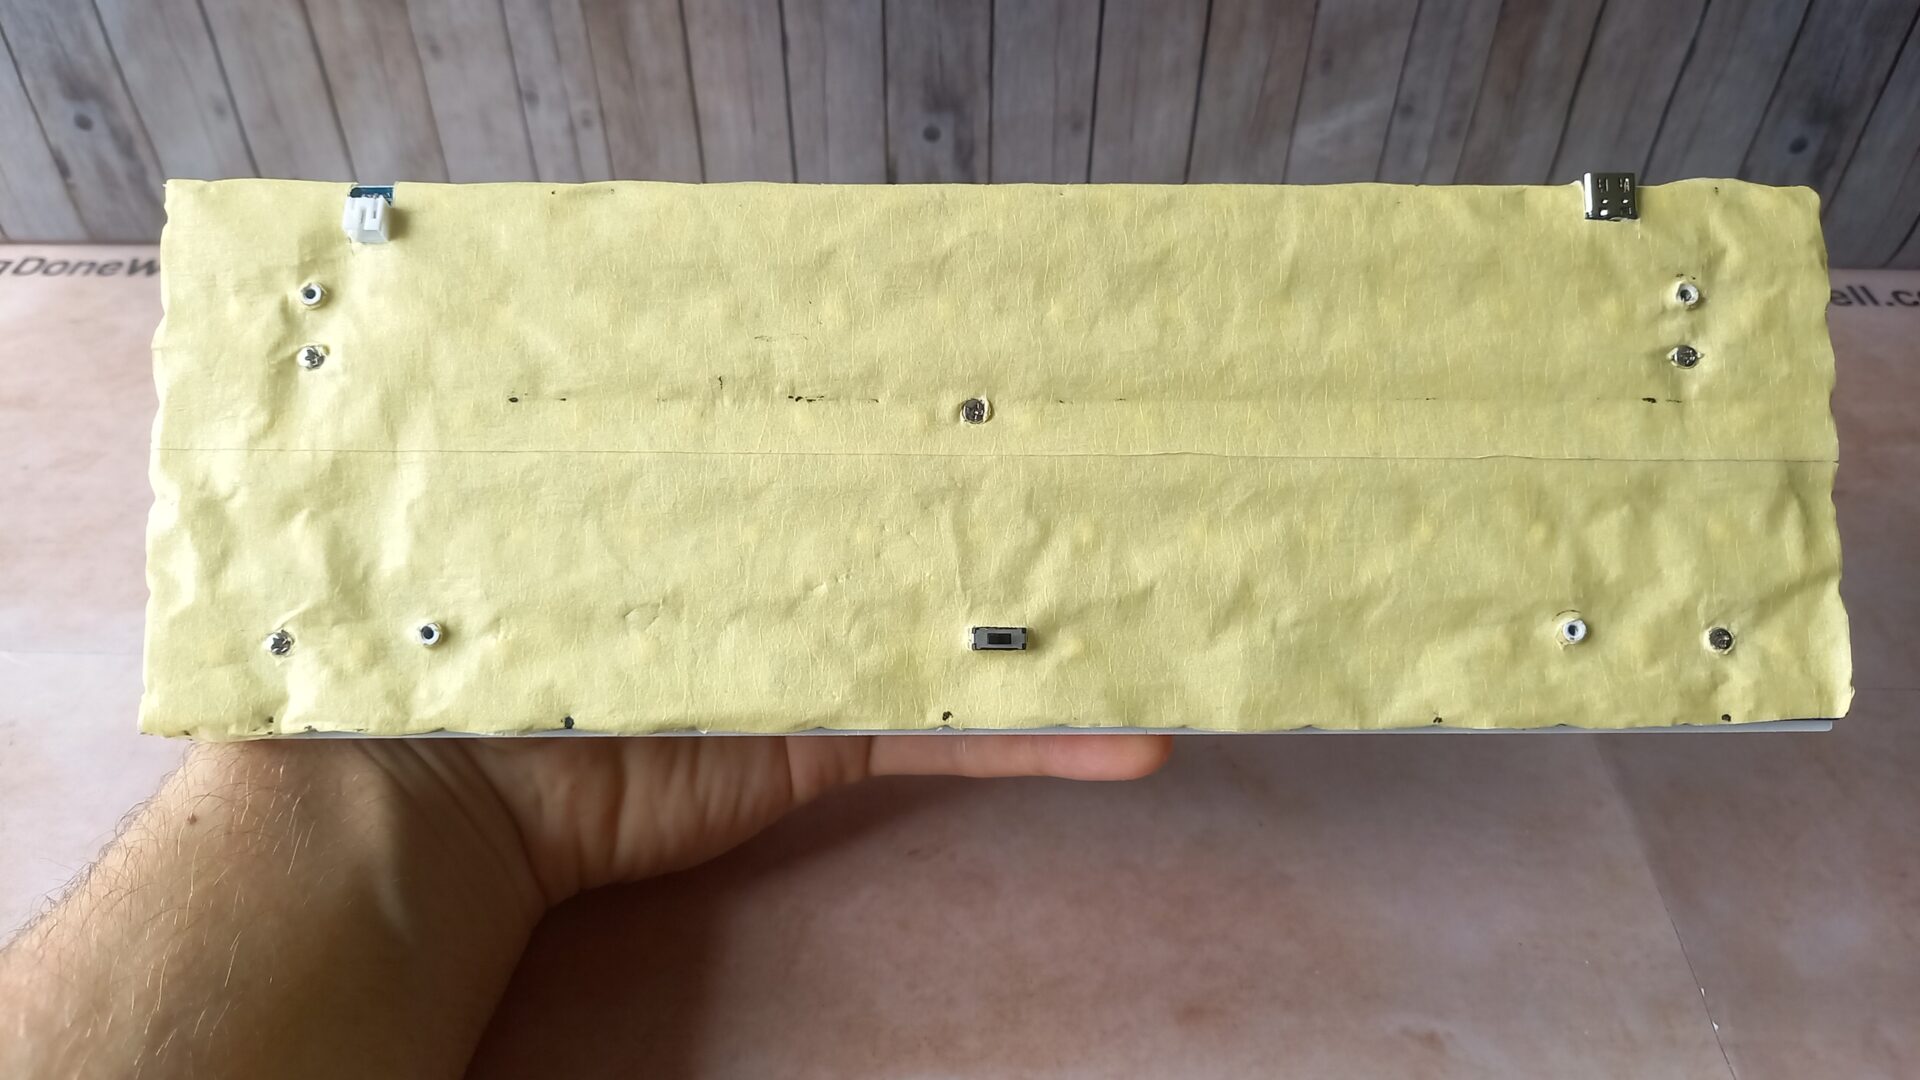
To Tempest Tape mod your keyboard, disassemble it and apply double-sided tape to the PCB and case. Reassemble the keyboard for improved sound and feel.
Tempest Tape modding enhances your keyboard’s acoustics and typing experience. Many gamers and typists prefer this method for its affordability and effectiveness. The process involves using double-sided tape to dampen vibrations, resulting in a quieter and more satisfying keystroke. This mod is popular among mechanical keyboard enthusiasts who seek a premium feel without breaking the bank.
Whether you’re aiming for a more muted sound or a unique aesthetic, Tempest Tape modding is a simple DIY solution. This guide will walk you through each step, ensuring your keyboard is customized to your liking. Get ready to transform your typing experience with this straightforward mod.
Tempest Tape Modding has gained popularity among keyboard enthusiasts. This mod enhances sound and feel. It uses a special tape to dampen vibrations. Many gamers and typists enjoy this upgrade. It transforms a regular keyboard into a personalized tool.
The Rise Of Keyboard Customization
Keyboard customization has exploded in recent years. Many users seek unique aesthetics and functionalities. Tempest Tape Modding is one of the latest trends.
- Mechanical Keyboards: Users can replace switches easily.
- Keycap Swaps: Color and design can be changed instantly.
- Sound Dampening: Mods like Tempest Tape reduce noise effectively.
Many forums and social media groups share tips. This community thrives on creativity and innovation. Tempest Tape Modding stands out due to its simplicity and effectiveness.
Benefits Of Tempest Tape Modding
Tempest Tape Modding offers several advantages. Users experience improved sound quality and comfort. Here are some key benefits:
| Benefit | Description |
|---|---|
| Noise Reduction | Dampens vibrations for a quieter typing experience. |
| Enhanced Feel | Improves the overall tactile feedback of keys. |
| Easy Installation | Can be done at home with minimal tools. |
| Cost-Effective | Requires only tape, making it budget-friendly. |
Tempest Tape Modding helps personalize your keyboard. It allows for a unique typing experience. Enjoy the benefits while showing off your style.
Essential Tools And Materials
To successfully mod your keyboard with Tempest Tape, you need some specific tools and materials. Having the right items ensures a smooth and effective modding experience. Below, we’ll cover the essentials for your project.
Choosing The Right Tempest Tape
Tempest Tape comes in various types and sizes. Here’s what to consider:
- Thickness: Choose a thickness that balances sound dampening and key feel.
- Adhesive Quality: Look for a tape that sticks well but is easy to remove.
- Material: Opt for a fabric-based tape for better sound absorption.
Additional Tools For The Mod
Beyond Tempest Tape, you’ll need a few more tools:
- Scissors: For cutting the tape to the right size.
- Tweezers: Helpful for placing the tape precisely.
- Ruler: Ensures accurate measurements for the tape.
- Isopropyl Alcohol: Cleans the keyboard surface before applying tape.
- Microfiber Cloth: For a clean finish.
Having these tools ready will make your Tempest Tape modding process easier and more effective.
Preparing Your Keyboard
 Before you start the Tempest Tape Mod, it’s essential to prepare your keyboard. Proper preparation ensures better results and a smoother modding process. Follow these steps to get started.
Disassembling Your Keyboard
Disassembling your keyboard requires care. Follow these steps:
- Unplug your keyboard from the computer.
- Gather necessary tools: a screwdriver, plastic prying tool, and a clean workspace.
- Remove screws from the back of the keyboard. Keep them in a safe place.
- Use the plastic prying tool to gently separate the top and bottom cases.
- Carefully lift the circuit board out. Avoid damaging any components.
Check for any hidden screws or clips. Some keyboards have them under the rubber feet. Always handle parts gently to prevent breakage.
Cleaning And Maintenance Tips
Cleaning your keyboard is vital for optimal performance. Here are some tips:
- Use a soft brush to remove dust and debris.
- Wipe surfaces with a microfiber cloth.
- For tough spots, use isopropyl alcohol on a cotton swab.
Inspect the switches for dirt. A clean keyboard enhances the modding experience. Regular maintenance keeps your keyboard in top shape.
| Cleaning Task | Frequency |
|---|---|
| Dusting | Weekly |
| Deep Cleaning | Monthly |
| Switch Inspection | Every 3 Months |
With a clean keyboard, you are ready for the Tempest Tape Mod. This preparation sets the stage for a successful modding experience.
Applying Tempest Tape
Applying Tempest Tape is a simple yet effective way to enhance your keyboard’s sound and feel. This method dampens vibrations, providing a more satisfying typing experience. Follow these steps to transform your keyboard.
Cutting Tape To Size
Start by measuring the area where you want to apply the tape. Use a ruler for accuracy. Cut the tape into pieces that fit your keyboard’s surface. Here’s a quick guide:
- Measure the width and length of the keyboard.
- Cut strips about 1 inch wide.
- Ensure the strips match the keyboard’s layout.
Use scissors for clean cuts. Avoid jagged edges to ensure a smooth application.
Strategic Placement Techniques
Placement is key for maximum effectiveness. Here are some strategic tips:
- Apply tape to the bottom of the keyboard.
- Focus on areas where the PCB touches the case.
- Cover larger surfaces for better sound dampening.
Consider these points:
| Area | Effect |
|---|---|
| Bottom Plate | Reduces vibrations |
| Key Switches | Softens keystrokes |
| Stabilizers | Minimizes rattling |
Press down firmly to ensure the tape adheres well. This enhances durability and effectiveness.
Reassembling Your Keyboard
 Reassembling your keyboard after a Tempest Tape mod is exciting. This step brings your custom setup back to life. Follow these steps carefully to ensure everything works perfectly.
Reinstalling The Components
Start with the key switches. Place them back into the keyboard plate. Make sure they align correctly. Here’s a simple checklist:
- Confirm all switches are clean.
- Insert each switch firmly into its slot.
- Check orientation. The pins should fit snugly.
Next, reinstall the PCB (Printed Circuit Board). Follow these steps:
- Carefully place the PCB back into the case.
- Reconnect any wires if necessary.
- Secure the PCB with screws.
Finally, add the keycaps back onto the switches. Press down firmly until you hear a click. Enjoy the satisfying sound!
Ensuring Everything Is Secure
Before closing the case, double-check all connections. Look for loose wires or misaligned parts. Here are key points to verify:
- Ensure the PCB is firmly attached.
- Check that all switches are seated correctly.
- Make sure no foreign objects are inside the case.
Close the keyboard case. Tighten all screws securely. Test each key to confirm they work correctly. Enjoy your newly modded keyboard!
Sound Testing And Adjustments
Sound testing and adjustments are crucial for your keyboard modding project. Proper tuning enhances your typing experience. It helps you achieve the desired sound profile. Follow these steps to ensure optimal results.
Conducting A Sound Test
Start by recording your keyboard’s sound. You can use a smartphone or a microphone. Follow these steps:
- Place your microphone about 6 inches from the keyboard.
- Type a few sentences at your normal speed.
- Record the sound for 30 seconds.
- Play back the recording to evaluate the sound.
Listen for:
- Clicking sounds
- Thock noises
- Any unwanted rattles
Compare your recording with other keyboards. This helps you identify your keyboard’s unique sound profile.
Making Necessary Modifications
After evaluating the sound test, you may want to make changes. Here are some common modifications:
| Modification | Description | Expected Outcome |
|---|---|---|
| O-Rings | Install O-rings on keycaps. | Reduces bottom-out noise. |
| Foam Dampening | Add foam inside the case. | Minimizes echo and vibrations. |
| Switch Lubing | Apply lubricant to switches. | Smoother key presses and quieter sounds. |
After making changes, repeat the sound test. This process helps you refine your keyboard’s sound further. Adjust as necessary until you achieve the perfect sound.
Enjoy your custom keyboard that sounds just right!
Advanced Tips For Enthusiasts
Enhancing your keyboard with Tempest Tape Mod is exciting. Advanced tips can improve your keyboard’s performance. These techniques cater to enthusiasts who seek perfection.
Combining Mods For Optimal Performance
Combining different mods can yield impressive results. Here are some effective combinations:
- Tempest Tape + Lubing Switches: Reduces noise and enhances feel.
- Foam Dampening + Tempest Tape: Minimizes vibrations and improves sound quality.
- Stabilizer Mods + Tempest Tape: Stabilizes keys, reducing rattling.
Experimenting with these combinations can lead to a custom feel. Each mod contributes uniquely to your keyboard’s performance.
Troubleshooting Common Issues
Sometimes, issues arise after modding. Here are common problems and their solutions:
| Issue | Solution |
|---|---|
| Keys Sticking | Check for excess tape or debris. |
| Weird Sounds | Inspect switch placement and lube application. |
| Unresponsive Keys | Ensure connections are secure and clean. |
Following these steps can help restore your keyboard’s function. Regular maintenance is key to longevity.
Maintaining Your Modded Keyboard
After modding your keyboard with the Tempest Tape, keeping it in great shape is essential. Proper maintenance ensures durability and performance. Follow these tips for a long-lasting modded keyboard.
Regular Cleaning And Care
Cleaning your keyboard is vital. Dust and debris can build up over time. Here are simple steps for regular cleaning:
- Turn off your keyboard: Always disconnect it before cleaning.
- Use compressed air: Blow away loose dirt and particles.
- Wipe the surface: Use a microfiber cloth dampened with water.
- Clean the keycaps: Soak them in warm, soapy water.
Perform these cleaning tasks monthly. Regular care helps maintain sound quality and feel.
When To Redo The Tempest Tape Mod
Signs indicate it’s time to redo your Tempest Tape Mod:
- Sound quality changes: Noticeable rattling or vibrations.
- Wear and tear: Tape starts to peel or lose adhesion.
- Sticky keys: Keys feel sluggish or unresponsive.
Inspect your keyboard every few months. Replace the tape if needed. A fresh mod enhances your typing experience.
Frequently Asked Questions
What Is Tempest Tape Mod For Keyboards?
The Tempest Tape Mod is a popular modification technique for mechanical keyboards. It involves applying tape to the keyboard’s PCB to reduce vibrations and enhance sound dampening. This mod improves the overall acoustics and feel of your keyboard, making typing more enjoyable and quieter.
How Do I Apply Tempest Tape?
To apply Tempest Tape, first, disassemble your keyboard carefully. Clean the PCB surface to remove any dust or residue. Next, cut the tape to size and apply it evenly across the PCB. Reassemble your keyboard, ensuring everything is securely in place for optimal performance.
What Are The Benefits Of Tempest Tape Mod?
The benefits of the Tempest Tape Mod include reduced vibrations, improved acoustics, and a more satisfying typing experience. It can also enhance the longevity of your keyboard by minimizing wear on components. Overall, this mod makes your mechanical keyboard feel and sound better.
Can I Remove Tempest Tape Later?
Yes, you can remove Tempest Tape later if desired. Carefully disassemble the keyboard and gently peel off the tape from the PCB. However, be cautious to avoid damaging any components during the removal process. You may also need to clean the surface afterward for best results.
Conclusion
Tempest taping your keyboard can enhance both sound and feel. This simple modification is accessible for everyone. With the right materials and techniques, you can achieve a personalized typing experience. Embrace your creativity and enjoy the satisfying results. Start your keyboard journey today and transform your typing experience effortlessly.


